The 2nd stage of the Carnival of Wonders that is the boy's 10th birthday was the Treats for Class. I'm usually good for some pretty decent class treats, but this year's had to be a show-stopper because it's the last one. Ever. Next year he'll be starting that Carnival of Horrors that is Middle School.
So, of course, the answer is Bakerella's Cupcake Pops - adorable, easy (if time-consuming) to make, easy to transport and serve and definitely a sure-fire way for the kid to win friends and influence people.
Everything was going fine in Cakepopland, and I left the room for a sec. When I came back, the boy was giggling uncontrollably and pointing at this....
Yep, the pop has slid down the stick, leaving the mini M&M perched at the top. I said, "Well, they must have been out of the fridge too long, let's pop 'em back in."
So we did, and 10 minutes later....
Yep, TWO had slid down and leaving their M&M toppers balancing like PillippePetit atop yon dizzy heights. I thought Max was going to bust a gut!
Luckily, I've rescued far worse mishaps than thus (do I have to remind you about the Tempest in a Teacup?) and was able to save them with a little bit of Candy Melt and a little bit of love.
It was the boy's 10th birthday this week, and being what Max calls a "cake mom" I wanted to include a special treat in his lunch. My solution? A "cake" made of Oreos covered in fondant and decorated with the candy melts that keep on giving (I've already used them for Giant Cookie and teacup Cakepops) It's a great way to use up random scraps of fondant (which keep forever in the freezer)
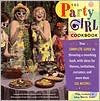
I have to admit this wasn't a wholly original idea - I'd seen it in an American Girl book at the Scholastic Book fair a couple of years ago and had been wanting to dry it ever since.
The best part? It fits right in Max's lunch container, and because it's fondant and candy melts, it holds up really well.
And yes, the kid got a v. unhealthy lunch of a pizzadilla, Cheez-its and a mini cake for his birthday - you only turn 10 once and you don't have to eat fresh fruits and veggies if you don't want to!
We had a bakesale to raise money for Habitat for Humanity at work yesterday, so I made a couple of batches of biscotti - its my go-to cookie for these kinds of things: easy & cheap (like me!) and keeps well for many days (maybe not so much like me...)
Because it's been well established that I'm a big show-off AND, I wanted to offer a great presentation that would really bring in the bucks for a fabulous organization, I packaged the cookies in these cute little bags:
The bags are little cello bags I got at the Mrs. Grossman's warehouse sale. I folded over the top a couple of times, and stapled in the center.
Then I cut a piece of pattered scrapbook-type paper into a 3.5" x 3.5"-ish square and folded it in half. I put this little "tent" over the top of the folded bag, and gave it two staples on the side.
The cute cut-out on the top is a Mrs. Grossman's Slice of Life: Homemade Cardstock Sticker. When I worked at Mrs. Grossman's, I learned that if you put a little baby powder on the back of a sticker - it takes away the stick and you can pop them off the edge - fun!
This is a short video that show other ways you can use this powdering technique for stickers:
My KGO Colleague Pat Thurston is an inspiration on many levels. She's a proud armed forces vet, intelligent and entertaining talk show host, a tireless and loving mother to triplets (that's right, triplets) she had in her 40s, and a talented and generous baker.
On the occasions I get to work with Pat I get to enjoy not only her lovely company - but a home made treat like lemon bars, brownies or this insane Peanut Butter Pie.
When Pat serves it, she says, "You HAVE to put whipped cream and chocolate sauce on it otherwise you can't have any."
Now THAT's a rule I can live with!
Pat's PB Pie (with a little adaptation by Lara)
For Crust
11 whole graham crackers (one of the three packs in the box) 6 T butter, melted 1 T sugar
Preheat oven to 350
Grind the crackers in a food processor until fine. Add the melted butter & sugar and pulse to combine and get all of the crumbs wet (for my money the smell of melted butter and graham cracker is one of the best in the world)
Dump the crumb mixture into a 9" pie pan, press it down and up the sides with a wooden spoon.
Bake for 6-8 minutes to set the crust, then let it cool while you make the ganache.
For Ganache
3 oz bittersweet chocolate (1/2 cup chocolate chips)* 1/2 cup whipping cream
Heat the cream in a small pan over medium-low heat until its just bubbling on the edges. Add the chocolate, stir a few time, then put the lid on the pot & let the mixture set for about 5-10 miniutes. Then stir until smooth. Spread the mixture over the graham cracker crust.
Cool the coated crust in the fridge while you make the filling.
For Filling:
8 oz cream cheese, softened
1 cup sugar
1 cup creamy peanut butter
2 T melted butter
1 cup whipping cream
1 T vanilla
Beat cream cheese until fluffy, slowly add sugar, peanut butter and melted butter and beat until blended and fluffy.
Whip the 1 cup cream in a separate bowl. Add vanilla. Fold the whipped cream into the PB mixture until it is blended in - no white streaks showing. Pour it into the pie shell and chill for about 3 hours. You can pop it in the freezer to speed up the chilling.
Whip the 1/2 cup cream you'll have left after making the ganache and the filling and use it to decorate the top of the pie - pipe it with a pastry bag if you're feelin' fancy, schmear it with a spatula if you're not.
*In the spirit of full disclosure, when I made this particular pie I messed up and made the ganache with unsweetended chocolate (It was TJ's brand and I guess my brain associated that wrapping with their "Pound Plus" bars) I added some sugar and a little butter and it tasted fine. A little grainy, but had a good dark chocolate flavor that was a nice contrast to the sweet, fluffy filling.
Also, the pie is super easy to make, but does mess up a lot of dishes (two big bowls, a pan, the food processor, etc) so promise to make it for your family if someone else promises to do the dishes - it worked for me :)
This was circa 1995 I think, and the blurry photo above was taken with a film camera in our sunny kitchen in San Francisco.
As soon as I saw the chef on the series Cooking Secrets of the CIA making Chocolate Tea Cups with Tuile Spoons I NEW I had to make them.
What you do is melt chocolate, dip in a 3/4 blown balloon - water balloon size - and then let the chocolate harden. Once it does, you poke the balloon with a pin right near the knot and let the air slowly come out. Voila! You've got a chocolate cup. Pipe a "C"-shaped handle and attach it with melted chocolate.
Sounds easy right? It is... until....
Until you have a balloon with a weak spot or chocolate with a hot spot or a deadly combination of the two.
As my husband describes it, "There she was in the kitchen, happy as a clam dipping her balloons. I leave the room for a sec and hear a loud, 'Oh !@#$%^&*!!!!!!'. I go back into the kitchen and it looks like a chocolate crime scene."
Yes, one of my balloons POPPED a couple of inches above the bowl. It looked like a crazy person had splattered chocolate all over the place. I was cleaning chocolate for months and months. It was under the chairs, behind the shelves, on top of the fridge....
But isn't the cup the cutest thing???? I filled it with coffee mouse and topped that with whipped cream and a Tuile Spoon to our friends Beth and Scott - who not only got a yummy dessert, but a funny story.
Tuile means "tile" in French, and is a classic, old-fashioned cookie. The traditional shapes are usually a shaped oval (almost like a Pringle) or rolled into a "cigarette." It's fun to play around with different shapes.
Makes about 24
6 tablespoons unsalted butter
3/4 cup confectioner's sugar
1/2 tablespoon vanilla extract
whites of 3 eggs
1 cup all-purpose flour
Preheat the oven to 400 degrees F.
In a bowl, cream the butter, sugar, and vanilla together. Gradually beat in the egg white, then fold in the flour until you have a smooth paste. Chill for about 2 hours.
Place small spoonfuls of the mixture about 4 inches apart on a nonstick baking sheet, then spread these out into rounds with a spatula.
Bake for about 4 minutes until the mixture is just beginning to color (keep checking).
Remove from the oven and leave to cool very slightly until you can handle them. Shape the rounds by draping them over the length of a rolling pin or as described below. Leave until completely cool and set, then lift off gently. you can keep the tuiles in an airtight container for up to a week.
Other Shapes:
Baskets Depending on the size you want, drape your warm rounds of baked tuile over the top of a clean bottle or gently press them inside a tea or custard cup and leave until cool.
Stencils Take a piece of clean cardboard and cut out the shapes you want: say, flowers or leaves. Lay the cardboard stencil on your baking sheet and spread the mixture over the top. Lift off the cardboard carefully before baking.
Threadless is a well-cool web site where you can upload your well-cool designs and have them printed on T-shirts. Cool!
For the past three years they've been holding Threadcakes, a contest for cake decorators to submit photos of cakes inspired by their favorite T-shirt designs. The results are beyond amazing! When I'm asked why I don't make cakes professionally, the answer is right here. Just look a what a real pro can do:

 Yep, the pop has slid down the stick, leaving the mini M&M perched at the top. I said, "Well, they must have been out of the fridge too long, let's pop 'em back in."




 Posts

